July 1, 2007


Progress Pictures:


Due to popular demand (o.k. some friends naggging us...) here are few more photos.

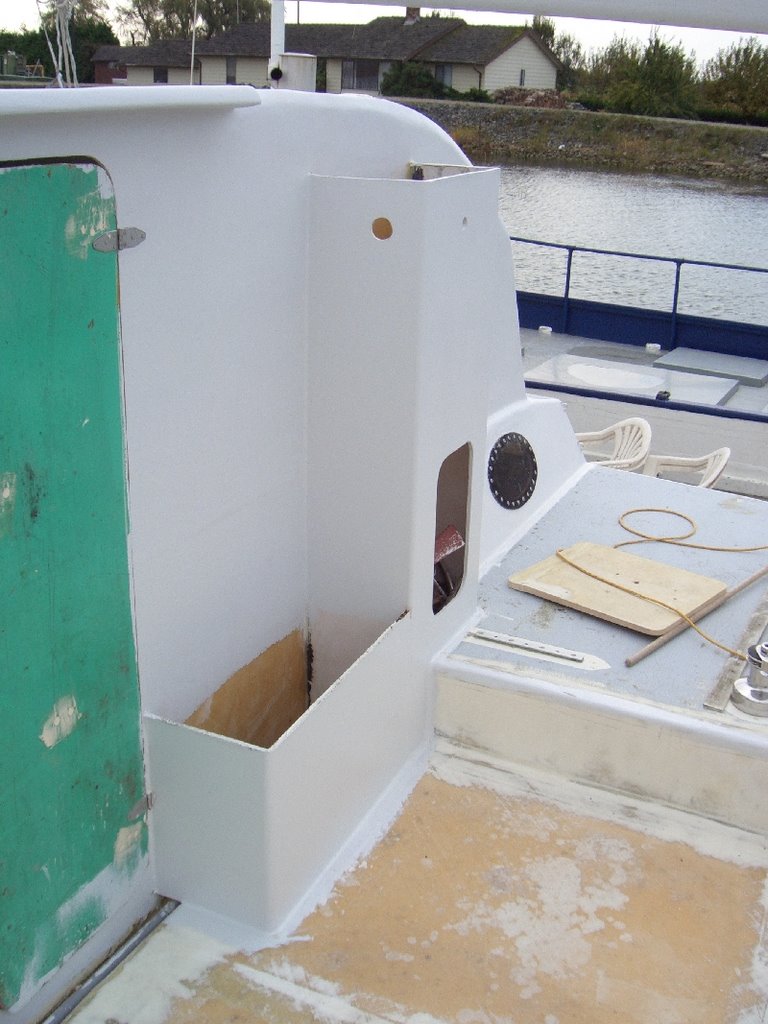
Back cabin door. It's a dutch door so you can open the top part when it's raining or rough and still keep good ventilation. The little 4" overhang over it keeps the rain out nicely. It will look nicer when all painted.


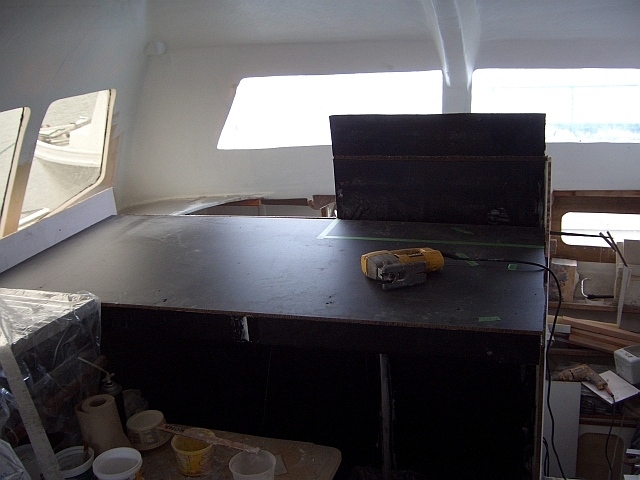
Main saloon table. About 6' x 3' or so. Room for 6 people to sit around it for dinner I suppose. The table legs are ex-windsurfer carbon fiber masts. Very nice und stiff. 1" thick carbon/nomex honeycomb core with 1/32" thick maple veneer laminated to top surface.


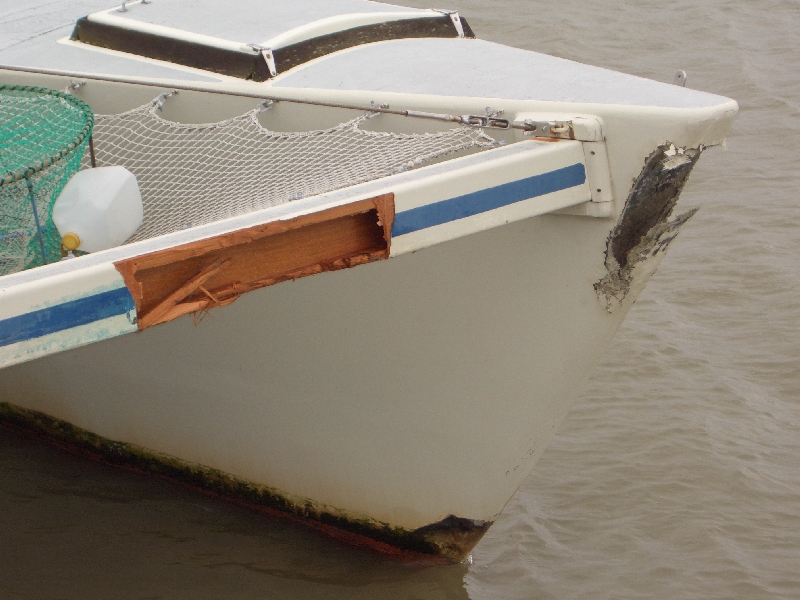
This is an example of "Evan gets carried away with himself" or "carbon fiber boat porn". Here I could have bolted on a nice off-the-shelf turning block for the genoa sheet. Not me, no way. Would have taken like 1/2 hour probably.

First I buy this very trick sheave from Harken (a sheave for you landlubbers is like a pulley, without the side plates). Super good deal, high load capacity, Torlon roller bearings etc. but no side plates.

Again I could have done these side plates in aluminum. But no, first I laminate the lower side plate in carbon fiber, molded in place to match the curved solid fiberglass mounting pad. Then pop it off the mounting pad, trim it to shape, and re-glue to mounting pad.

Then make up a foam wedge that has the same profile as the sheave, cover it all in mylar tape, laminate the top side plate in carbon. Let it cure, pop it off, trim it, glue it back in place.

That's where we are today, drilling holes through this fitting for my original sheave. I probably have 3 hours or so into each one of these (1 port and 1 stbd.). Sometimes I'm too clever for my own good.

April 22, 2007

Galley countertop and nice shiny double s.s. sink... (box of fasteners on top of the stove)

April 14, 2007


Today that side had the galley counter added, a very nice shiny double sink installed too. Also I buggered up a piece of formica, so I have to buy another sheet (and hope that I can find the matching type!)

March 10, 2007

Galley - Starboard Side


Today was "demolish the starboard side of the galley day". I bashed my finger so I'm typing very slowly..


Lots of fun photos.... all this was done today. The "foggy" picture is airborne dust after grinding. And yes mom, I wear my mask!

Test fitting the stove. Very snug fit.

February 26, 2007

Chart Table / Writing Desk

Is nearly complete except for a few lifting openings...

The jig saw is to give you a bit of scale. About 6' wide x 30" deep.
To the left will be a bench seat, on the right side, room for a desk chair. There is a fair bit of overhang that is hard to see in the photo. The upright black thing is a bookshelf in progress.

February 14, 2007

The GV10 is my design that is for sale at www.bateau.com. I've designed a number of stitch and glue boats for that site, and the owner Jacques has done many more. Check it out sometime.

The outside seams are done; another 3-1/2 hours. Total time is 14-3/4 hours. The temperatures in my friend's garage are rather cold - epoxy put on one night is still quite sticky the next night.

February 3, 2007


Galley Progress

The galley is coming along very nicely. The port side is the more challenging; the counter has an angled bend at the fwd. end, and the fridge had to be built in, and chart table above.

The fridge was built using an old refrigerator liner and insulated all around with 6" of extruded polystyrene. (The pink stuff). Polyurethane foam has a better R value (about 20% better) but over time it absorbs water from condensation very easily and loses insulative value.

In the picture the lockers above the counter will have hinged doors, the ones immediately below will be sliding plexiglass ones, and the lowest ones are open veggie bin lockers (like for potatoes and onions).

November 20, 2006


Oh Bugger!

We went down to the boat this weekend to sort out some interior details. A neighbor of the dock owner told us the bad news that another boat on the dock had come undone during the high winds we've been having recently. The other boat sat across our bows for a few minutes. Bashed in the foam false bows, ripped off the anchor roller, and really busted the forward cross beam.

We have lots of structure left so the boat isn't going to fall apart but it's going a mean a trip to the shipyard to get damage that is near the waterline fixed properly. Insurance should cover everything but it's a pain to have this happen...

October 29, 2006


We have paint.
(ta-dah!)

We now have some primer on the cabin. It looks much better than I had thought, now that the fairing compound is all covered up. Lots of little pinholes, a few areas where it isn't very fair, but overall I'm quite pleased. It also decreases the "visual bulkiness" of the cabin to have it painted.

Today I was sanding the primer. Nice high build epoxy, but it's hard stuff. I'm using 150 grit and it eats discs pretty fast. But it's very smooooth when you do sand it. Very nice tactile feel on the rounded corners. Thank god I don't have to sand the whole cabin top (which will be non skid) because it's half the surface area of the whole cabin.

The cockpit shot here has the battery box/see over the cabin step/bench seat shown.

August 13, 2006


Finally the adjoining boat is out of its slip and I got this good shot of the boat with windows in place. Fairing is coming along well and I hope to paint in about 1 month... (famous last words)